Terrain editor
Leveleditor
Custom Mod Setup
Understanding Heightmaps
Build the Bunker - 3ds Max
Build the Bunker - Maya
Import the Bunker
Build the Car - Maya
Import the Car
Create new team - Maya
Create new team - 3ds Max
Create new kits - Maya and Max
Mapping - General
Setup FH2/bf2editor
FH2 mapping guide
FH2 mapping standards
Mapping - Texturing
Texture system in bf2
Terragen skies
Terragen texturing
Mapping - Heightmaps
World Machine
Geocontrol and bf2hmt
Mapping - Lightmapping
Simple lightmap setup
Mapping - Downloads
Sky settings bf2
Water settings bf2
Lowdetailtextures/settings bf2
3D modelling/texturing
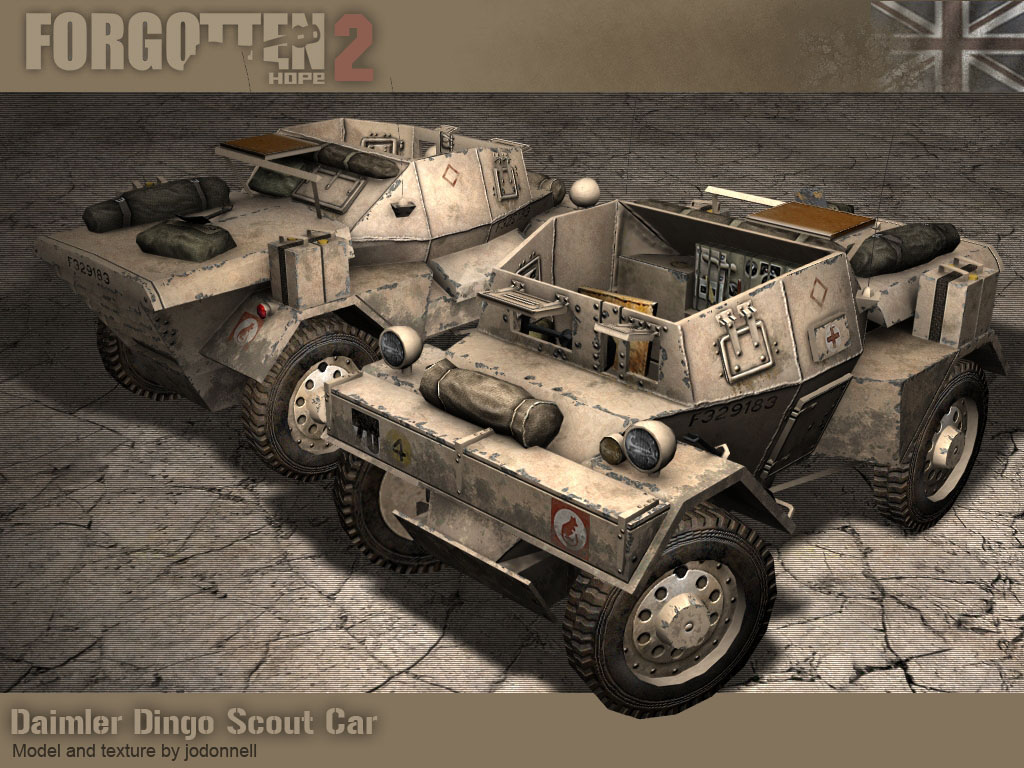
Skinning the Daimler Dingo
Coding
Skinning the Daimler Dingo
by jodonnell
Download the tutorial and sample files
(note: since this tutorial was written jodonnell has made a new PSD/tutorial but without written instructions and says that one more matches his workflow today down the new file here /fenring)
Hello, my name is James O'Donnell and I am an artist for the Forgotten Hope mod team (www.fhmod.org),
a World War II realism mod for Battlefield 1942 and Battlefield 2.
Naturally, a mod for a Battlefield game is going to entail the creation
of many vehicles, so today we will look at texturing worn metal. In
this case, I will show the steps I went through to texture a Daimler
Dingo scout car used by the British 'Desert Rats' in the North African
campaigns.
Texturing is one of the most important parts of the 3D art process - a
poor model can be saved by a great texture, but a bad texture will ruin
even the most detailed model. One of the most crucial parts in making a
successful texture is weathering - a common problem with textures is
that they are too simple and "clean." In the real world, there are
hundreds of minute variations on the surface of an object, even if the
object is factory-fresh. When you take, for example, a military
vehicle, then there should be even more visual detail from the
weathering and harsh conditions the object is exposed to.
Of course, on the other hand, it is very easy to go too far in this
regard. A texture that exhibits too much weathering, or in too bold a
manner, will be just as jarring as the object with no weathering at
all. Texturing is a constant balancing act between making an object
visually interesting with noticeable details, and avoiding making those
same details draw so much attention that they damage the overall
texture.
For this texture, I will be using Photoshop CS2, a Wacom
Graphire3 tablet (6"x8"), and a custom wear brush I have made (the
brush pattern image was found online.) While a tablet is not essential
for texturing, and there are many skilled texturers out there who can
get by without one, a tablet will make your life much easier thanks to
pressure sensitivity. It's not necessary to buy the largest and most
expensive tablet available, even a small size entry-level tablet is a
large step over mouse-painting. A good tablet is one of the best
investments you will make in texturing.
Also, when making your Photoshop document, be sure to name all
your layers something descriptive; you can also color-code them to make
it even more recognizable. I like to use a lot of layers in my
textures, and it can be a problem if they are all named Layer 1, Layer
2, and so on. A little preparation can go a long way here.

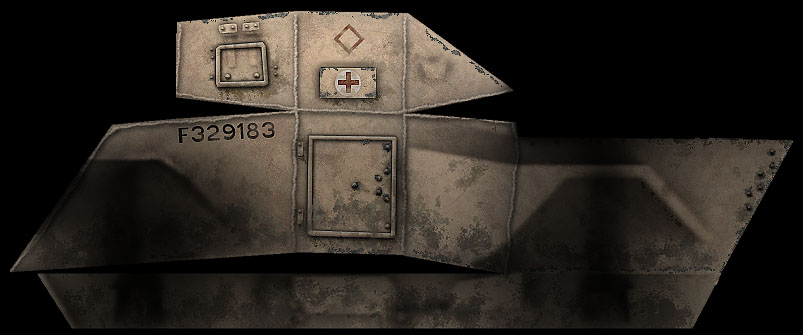
Here is the finished
result of my texture for the Daimler Dingo scout car. This is just the
left side of the vehicle, but the techniques are the same for the rest
of the vehicle. Because this is the North Africa version of the Dingo,
it is exposed to particularly harsh conditions, which makes it a good
place to start learning how to weather metal. Now that we've seen the
finished result, let's start from the beginning and see one way this
can be done.
This first step is nice
and simple. Just fill a layer with the color swatch of your choice - in
this case, I am using the standard desert paint the UK used in North
Africa. Also here is my UV layout. I will disable it for the rest of
the tutorial to not obscure the texture, but it is good to leave it on
in Photoshop at a low opacity, so you can see where you are painting.
Next, we will make a new
layer and fill it with 50% gray. When you are in Overlay mode, 50% gray
does not affect the image, and anything brighter or darker will be
applied to the layers beneath. We will run the Artistic->Sponge
filter to provide some basic metal variation. You can tweak the values
to whatever you like the most; in this case, all the sliders are at
zero. Put this layer on top of your color layer and set it to overlay.

Now we will make another
layer and again fill it with 50% gray. Use dodge and burn to paint some
broad strokes of value for visual interest. Set this to overlay as
well, and put it above your color layer.
This is what our texture looks like now, with the color layers and the two metal layers above it.
Now we will use the
custom brush to paint some variations in the paint. Make a new layer
that is above the color layer, but below the metal layers. Use the
color picker to pick a slightly lighter and slightly darker version of
your base color. Also, try varying the saturation and hue subtly, for
more interest. Do not use the dodge and burn tools here - dodge and
burn is only really useful for grayscale adjustment; when used on
colors it will look very lifeless. You can also take this opportunity
to add a very slight value/hue jitter to your brush. Now, just paint in
some regions of color. As a rule of thumb, edges and corners tend to
get darker as they accumulate grime, and wider exposed areas tend to
get lighter from sun exposure. This is not an absolute rule however,
and sticking to it dogmatically will make your texture look a little
stiff. Feel free to add little pockets of dark and light color
sporadically across the texture.
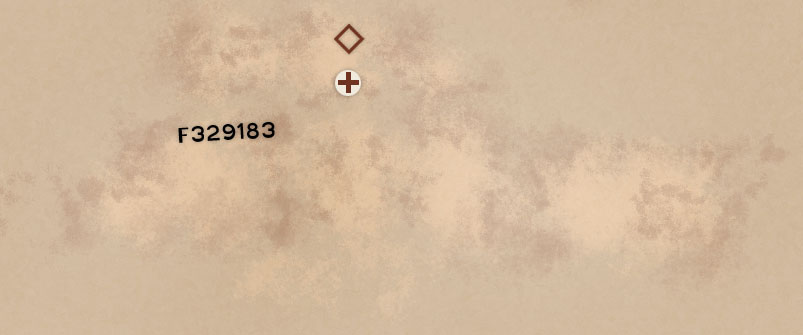
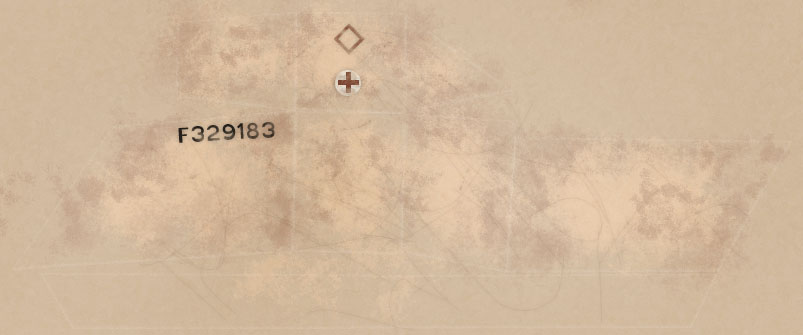
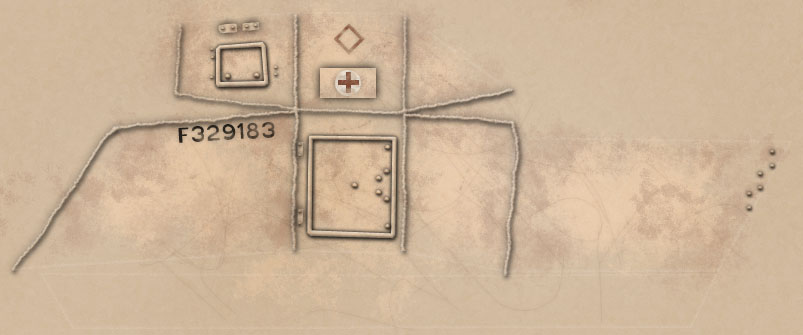
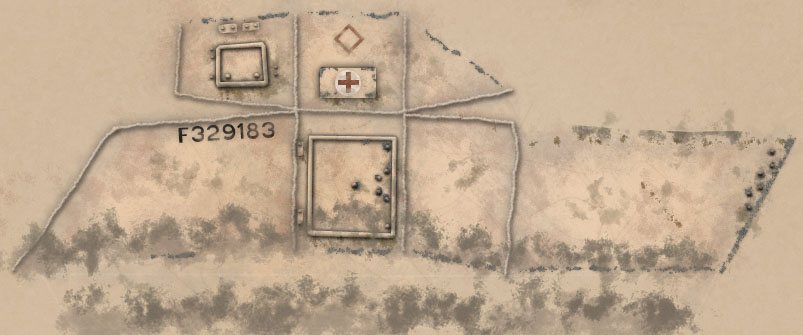
Make another new layer,
again above the color layers but below the metal layers. This will be
our decal layer - if your vehicle as any painted markings on it (which
it almost certainly will), put them here. Unit insignias, warning
labels, serial numbers, and so forth are found on almost every vehicle
in the world. If you are making a fictional vehicle, take care not to
go overboard with labels, but make sure you have some.
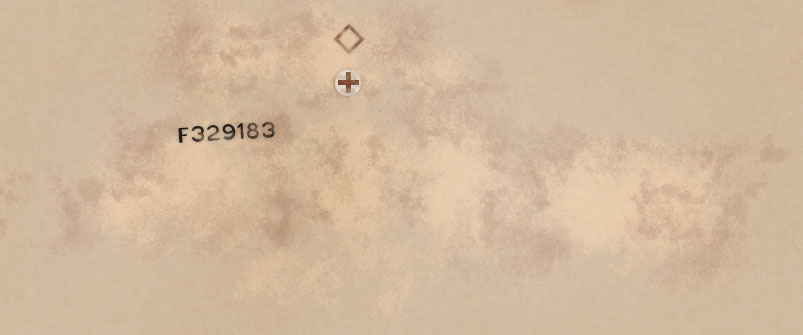
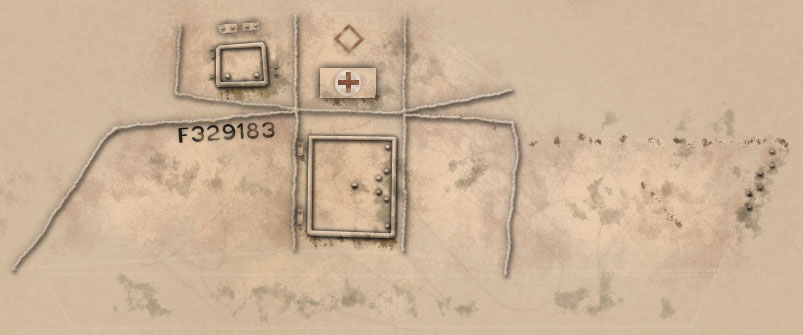
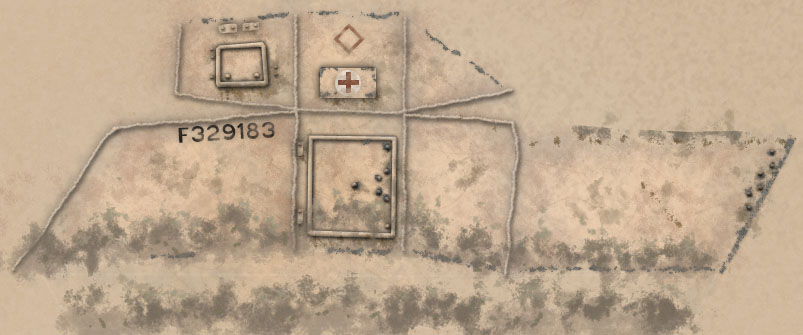
Just like all the other
parts of the vehicle, the painted decals will suffer wear. Make a layer
mask and mask out some of the details.
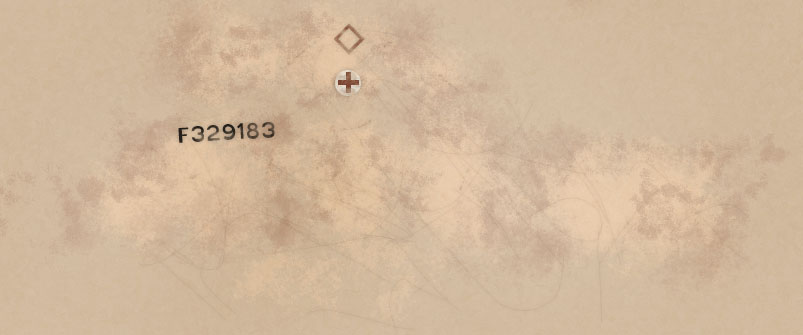
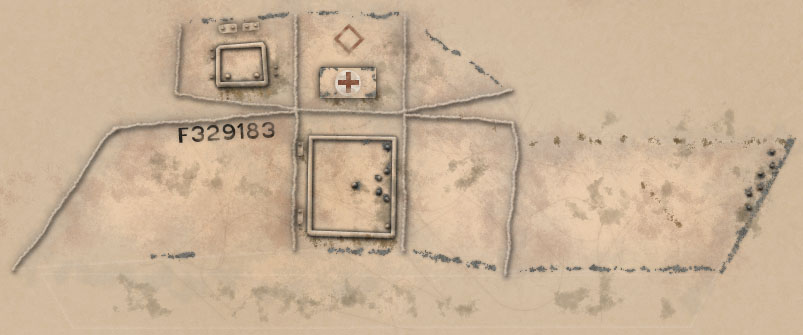
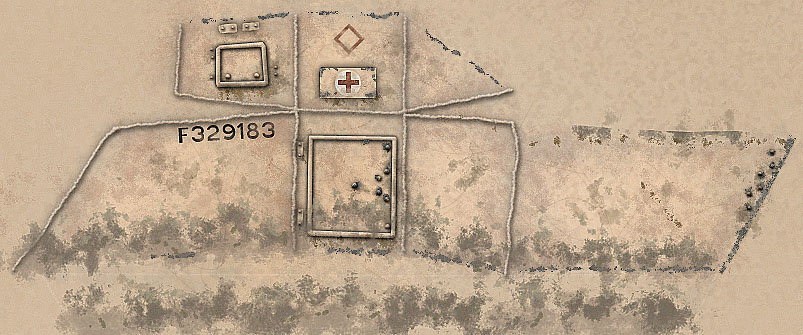
Now we shall add some
scratches to our vehicle. Make a new layer, and put it on top of your
metal and paint layers. Use a very small round brush (1-3px) set to a
dark color and draw some lines all over the place. Make them varied -
short, long, curved, etc. Then, we will add a very small Outer Glow
layer effect. Set the color to a slightly darker shade of your base
paint, and set the Outer Glow to Multiply. Turn the opacity down low on
the effect, and turn the layer's Fill property low as well. We are just
making small scratches; we don't want to make them look like huge
gouges.
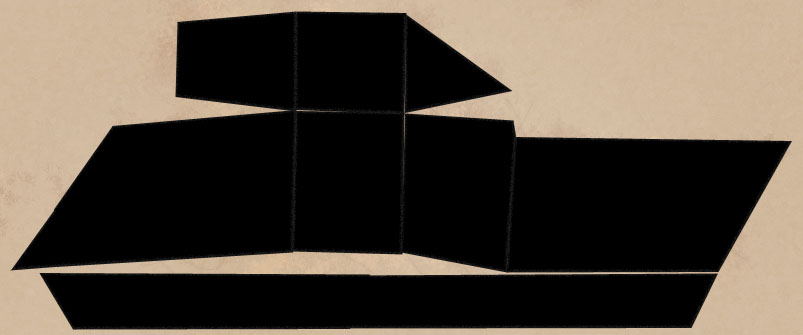
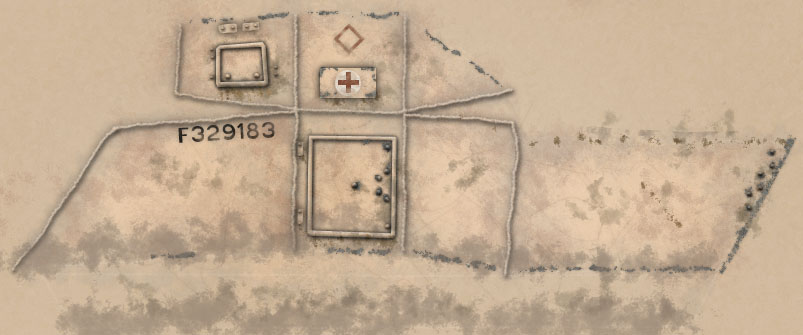
Now we are going to add
small highlights to the edges of the vehicle. Edges, being non-flat,
reflect more light in more directions. We will simulate this highlight
using Inner Glow layer effects. First, you will need at least two
layers. Choose every other contiguous section of your mesh, and fill
them black. The shapes should not be adjacent to each other - there
should be a gap between each where you have skipped a space (much like
a chess board.) Now, pick the other sections you skipped earlier, and
do the same. Add an identical Inner Glow layer effect to each, with the
color set to white and the Source set to Edge. It should be very small
and subtle; just enough to subtly highlight the edge. Finally, set both
layers to screen mode. Now the black shapes you made are invisible, and
only the highlight can be seen.
This is what our texture looks like with the edge highlight layers set to screen.
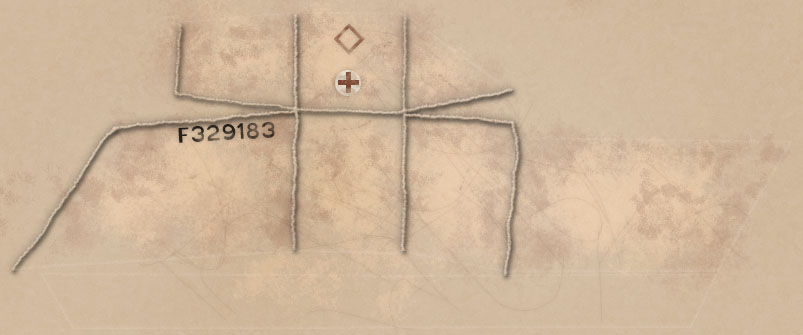
This vehicle has some
visible welded joints. We will draw these using a small round brush
with a very slight scatter (to simulate the unevenness of welding.) We
will draw these lines using 50% gray and set to Overlay mode. The
reason for this is that later on, we may want to change the base color
of our texture (for example, if I wanted to convert this to European
Olive Drab camo.) If we painted these welds with color, that would make
changing them later a hassle. By doing them in mid-gray on an Overlay
layer, we can potentially save time later. Once you have drawn all the
necessary lines, add a Bevel and Emboss layer effect, and add an Outer
Glow layer effect. Set the Outer Glow to a dark color and to Multiply
mode. I like to use dark Outer Glows instead of Drop Shadows because
they are non-directional, and they enhance the visibility of the layer
detail more than Drop Shadows.
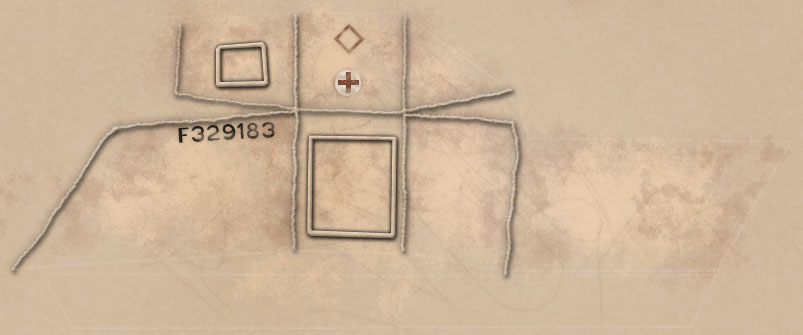
Now we add more of the
basic vehicle detail - in this case, there are some panels on the Dingo
with beveled edges. I simply use the rectangular lasso to draw my shape
and cut out the center, and add a Bevel/Emboss and Outer Glow layer
effect, just like the previous step. Again, we will do this with 50%
gray and an Overlay mode layer.
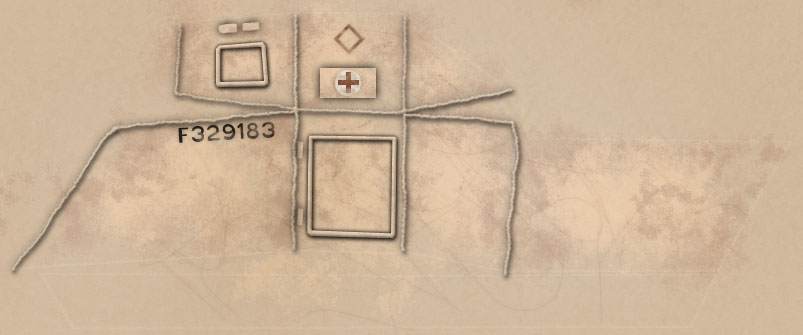
There are some other
panels beveled out here that would cast a local shadow on the vehicle -
in this case, a medical supply box, and the latches that secure the
windows and door. I draw in white rectangles in the appropriate places,
add a soft black Outer Glow, and set the layer to multiply - this hides
the white rectangles used to generate the effect, but keeps the Outer
Glow visible. Alternately, you can just set the level "Fill" to zero.
Again, some fairly
simple and self-explanatory detailing. Rivets, bolts, and the like are
visible on many vehicles, and adding them in adds to the complexity and
interest of the texture. Here, I simply referenced from photos where
all the rivets were. Use the circular marquee tool and fill in the
rivets with 50% gray on an Overlay layer as before. Again, add a
Bevel/Emboss and black Outer Glow.

It is now time to start
to grime up our vehicle. Using our splatter brush, we will paint some
yellowish-green grime onto our vehicle. Grime will accumulate in
corners and beneath overhangs (such as rivets or panels.) There will
probably also be splatters elsewhere, since combat is naturally messy.
Now we will go ahead and
add some more grime, but this time we will use more of a red-orange.
This will also represent some rusting on the vehicle. Again, it will
often accumulate beneath overhangs and open ports, where water or other
gunk might flow down.

Now that our vehicle is
nice and grimy, it is time to start to chip away at our metal. The
edges (particularly leading edges) of our metal will suffer the most
wear, with the paint being worn away to expose the metal beneath. It is
extremely important in this stage to keep in mind the scale of your
vehicle. If your scratches are too large for the size of your vehicle,
it will begin to look more like serious denting rather than the paint
being worn away. It is also important to avoid uniformity here - if
every edge has an even wear line, your texture will look very stiff.
There should be spontaneous breaks in the line, and it should have an
inconsistent width. Also remember that the wearing is only going to
happen on exposed edges - if your deep corners are worn, it will have
an off-putting effect (how did it get worn anyway?) To do the chipping,
I made a new metal layer like we did in step two. Then I mask it all
out, and then paint white into the layer mask to gradually reveal wear.
I also added a very small white Inner Glow and a very small black Outer
Glow. These help add a little bit of depth to the wear. Once you are
finished with painting the chipping, apply an Unsharp Mask filter to
your layer mask - this will make the edges of the wear more visible,
instead of looking muddy and soft.
We will now repeat the
previous step somewhat. Not all edges are completely worn, but most
will experience scuffing - light damage to the paint. Make a new metal
layer as before, but make it a bit lighter in value this time. Paint
into the layer mask the same way you did in the last step, but use a
larger brush size. The coverage can be more consistent this time, since
the effect will be more subtle anyhow. This layer should have a very
low opacity. Finally, just like the last step, apply an Unsharp Mask to
the layer mask when you are done.
We're in the home
stretch now! Just a few more steps to be done. Now we are going to add
mud/dirt to the vehicle. Since this is cruising around the desert, it
is going to be lighter colored dust/sand/dirt that attaches to the
metal, rather than dark mud like you might find in Europe. Paint a
light brown on surfaces exposed to mud and dirt - typically they will
be the lower surfaces on the vehicle (closer to the ground) and on
leading edges (from dirt/mud/etc splashing up onto the vehicle as it
drives through terrain.) Once you are done painting, add a very fine
(1-2%) colored application of the Add Noise filter. This will keep the
mud from being too flat.
Now we will add a second
layer of detritus, this time darker. Add this layer below the previous
mud layer, and paint a darker shade of brown onto your vehicle. Again,
just like the last step, add a small amount of colored Noise.

We shall paint one last
layer of mud. This will be the lightest color, and will be on top of
both of the previous layers. Before we were painting large mud
coverage; now we will paint the small stray clumps of stuff that stick
to our vehicle. Paint some small dabs here and there, some on the metal
and some on top of the other layers of mud. Of course, just like the
last two steps, finish off by adding a faint application of colored
Noise.
Time for our last step
of painting! Now we are going to add some dust to our vehicle. This
will be much fainter than the mud/dirt layers. Use the brush to paint
some large clouds of various shaders of brown. Then, add a layer mask,
and fill that with 50% gray. Apply the Sponge filter to the layer mask.
This will help get the dust to form small clumps. Use
Adjust->Brightness/Contrast and Levels to increase the contrast.
Finally, in areas that would accumulate more dust (flat surfaces where
it could rest on), use the Dodge tool on the layer mask to slightly
increase the visibility. On more vertical surfaces, you can use the
Burn tool on the layer mask to reduce the dust concentration. This
level will have an overall low opacity.
I said that we were done with painting, but we aren't quite done with
the texture yet. Although your texture may seem detailed now, it is
likely that is actually a little bit blurry and muddy. Select the
entire canvas and Copy Merged to grab a snapshot of your entire
document. Paste this into a new layer. First, apply a very subtle
degree of colored Noise - you will probably want 1% or less. The reason
this will be so faint is for our next step. Use the Unsharp Mask filter
to help bring out the detail you have so carefully painted. Use a
relatively high Amount setting (200%+), a low Radius (0.1-1.0 pixels)
and a Threshold of zero. Play with the amount until you are satisfied.
Unsharp Mask is a very powerful tool that can bring out a low of detail
and interest in your texture. However, remember that like any other
tool, Unsharp Mask is a force multiplier - it can bring out your
carefully painted details to a brilliant level, but it can also magnify
any minor flaws and errors very painfully. It is likely at this point
that you will want to go back and tweak certain layers, since they will
look much different after Unsharp Masking the document. I set up a
Photoshop action that would use Copy Merged on the document, paste it
into a new layer, and then apply the Add Noise and Unsharp Mask with
values I set in advance. Using actions in this way can make this
tweaking stage much easier. Once you are happy with your color texture,
we will move on to the final stage.
In my case, I built this
model with the intention of putting it in a real-time engine (the
Battlefield 2 engine in this example.) Many modern games have very
advanced lighting engines, capable of increasingly sophisticated
effects such as per-pixel lighting and self-shadowing. However, no game
engine can yet match the power of a professional rendering application,
like Lightwave. While vehicles can cast accurate shadows on themselves
and their environs, the soft shadows from radiosity and occlusion that
you see in reality are currently too slow for realtime. However, we can
pre-calculate this and bake it into our texture. If you are building
your model with the intention of using it in pre-rendered work, this
step isn't neccessary, but it will greatly enhance your real-time work.
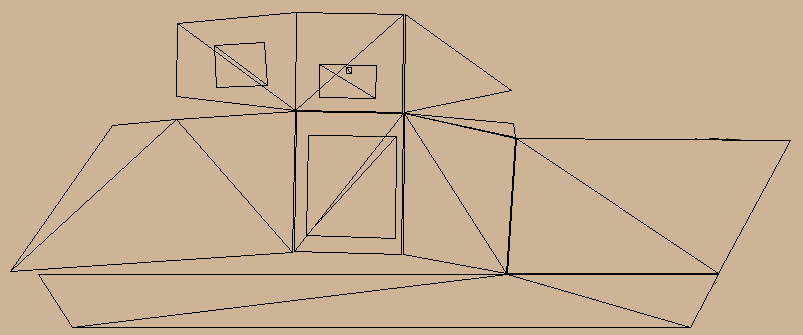
We will now use surface baking to precalculate the lighting of
the texture. In your object file in Modeler, add a large sphere in a
new layer. Face the normals inward, and position the object such that
the middle of the sphere is in line with the ground plane for your
vehicle. Delete the lower half of the sphere, and create a flat ground
plane polygon by connecting all the vertices along the midpoint of the
sphere. Essentially, your vehicle will be sitting on a flat plane with
a dome above it. Set the dome to one material, and the ground plane to
another. Make sure your vehicle is using just one surface - if you need
to control smoothing on it, temporarily unweld some points. In
Lightwave, set the diffuse of the ground plane surface and dome surface
to zero. Increase the Luminosity of the dome to about 100-150%, and
increase the Luminosity of the ground plane surface to about 25-50%. We
have the ground plane slightly luminous so that the underside of the
vehicle is not totally black. This might be fine for heavy vehicles
like tanks, but if a vehicle can conceivably flip upside down (which
our light car might) then you want to ensure the bottom of the vehicle
is at least partially visible. You may also need to add some small
point lights here and there for areas the light can't reach well (such
as the cockpit of a vehicle, if applicable.) You also may need to edit
your vehicle somewhat - you don't want to bake lighting on surfaces
that would rotate, like wheels. If you have wheels, copy them and
rotate them so they face upwards. Copy those wheels and assign them to
a new surface with 0% Diffuse, and delete their UVs. Put those
duplicate black wheels where the wheels would normally be - this is to
simulate the occlusion of the wheels, since the actual wheels are
elsewhere. On the vehicle surface, add a Surface Baker modifier. Set it
to only bake Illumination, set it to the correct UVMap, match the
resolution to your texture resolution, and check Antialiasing and
Shading Noise Reduction. Remove all texture from your vehicle surface,
and make it pure white, 100% Diffuse. We are not rendering the texture
here because we only need the baked illumination - we could bake it
with the texture if we wanted to, but that would require a re-bake
every time we edited the texture. By baking it without the texture, we
can just bake the illumination and use that as a layer in Photoshop.
Once you have all this set up done, set your Global Lighting properties
so that Shading Noise Reduction is enabled, Ambient Light is set to
zero, and Radiosity is enabled and set to Monte Carlo. Let it render
(it will probably take a long time), and when you are done, take the
image rendered from the bake and put it on top of your image in
multiply mode. Now your texture has great looking radiosity shadows, at
no cost to the real-time engine.
Final Rendered Image
In-game Shot
Now, we are finally done! Texturing can be a very long process,
but ultimately a good texture is what separates an OK model from a
great model. It is a very iterative process, and most of your time
spent will be on tweaking and re-evaluating certain parts of the
texture. Ultimately however, with enough elbow grease, a good result
will come out. When you are texturing, always keep in mind the "what,"
"how," and "why" of your surface - what is your surface made of, how is
it being impacted by its environment, and why are certain parts of it
the way they are (don't take anything in the appearance for granted -
question each part of the design and consider why it would be done that
way in a real-world situation.) With enough patience and observance,
anything is texturable. Good luck on your future projects!
James O'Donnell
jeodonnell@gmail.com
Forgotten Hope Artist - www.fhmod.org