Terrain editor
Leveleditor
Custom Mod Setup
Understanding Heightmaps
Build the Bunker - 3ds Max
Build the Bunker - Maya
Import the Bunker
Build the Car - Maya
Import the Car
Create new team - Maya
Create new team - 3ds Max
Create new kits - Maya and Max
Mapping - General
Setup FH2/bf2editor
FH2 mapping guide
FH2 mapping standards
Mapping - Texturing
Texture system in bf2
Terragen skies
Terragen texturing
Mapping - Heightmaps
World Machine
Geocontrol and bf2hmt
Mapping - Lightmapping
Simple lightmap setup
Mapping - Downloads
Sky settings bf2
Water settings bf2
Lowdetailtextures/settings bf2
3D modelling/texturing
Skinning the Daimler Dingo
Coding
Convert your Terragen cube cross skies to bf2 hemispherical format
By bibi5000 and Fenring
Tools needed:
HDRshop
ATI CubeMapGen
Terragen
sky.tgs - Terragen script.
Photoshop or similar.
Index:
Step 1: Making the sky in Terragen
Step 2: Make a cubecross with Cubemapgen
Step 3: Resave BMP in Photoshop
Step 4: Conversion in HDRshop
Step 5: Final touches in Photoshop
Step 6: Bf2editor
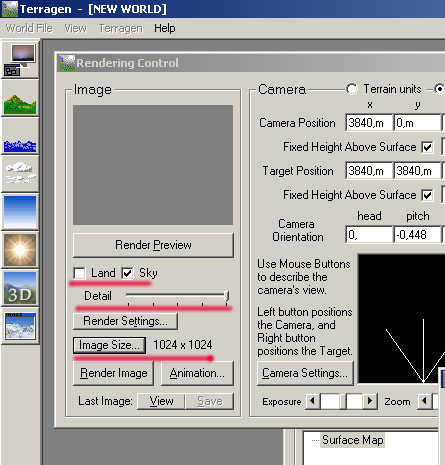
For the purpose of this tutorial we are just going to use the standard terragen sky, switch your detailpanel to highest, click render sky and deselect land, change image size to 1024x1024.
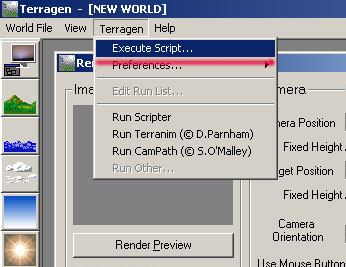
Execute the sky.tgs script you downloaded, this could take a while if you have a old/slow comp sit back and relax.
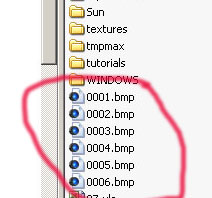
You should now have these files in the root of your c:\ drive.
Startup ATI Cubemap gen.

Select the skybox setting.
Load cubemap faces:
X+Face: 001.bmp
X-Face: 003.bmp
Y+Face: 005.bmp (you'll probably need to flip it to make this one fit, try "Flip Face Diagonal" and then "Flip Face Horizontal")
Y-Face: 006.bmp (blank)
Z-Face: 002.bmp
Z+Face: 004.bmp
Every face should now fit on the cubemap. The bottom is supposed to be black so dont worry about that.

Click "Save Cubecross", ill save mine as "testcross.bmp". Just click yes in the diaglogue box.
Step 3: Resave BMP in Photoshop.

Now you'll need to resave the file from cubemapgen in photoshop or similar program as a 24bit bmp since HDRshop cant read 32bit bmp files.
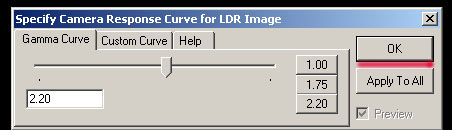
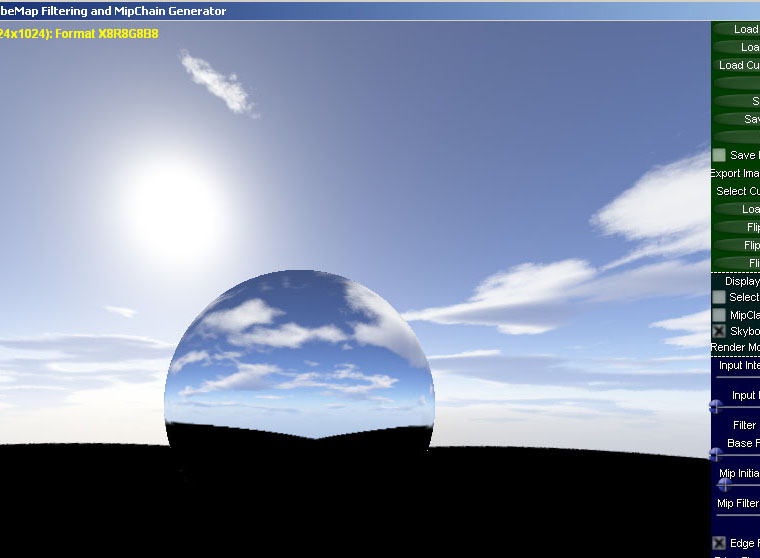
Start HDRshop and open your crossfile, just click ok in the dialogue box when the file opens. You may only see black when it opens, just right click and zoom out a few times if you wish to see your image.

Select image-panorama-panoramic transformations.
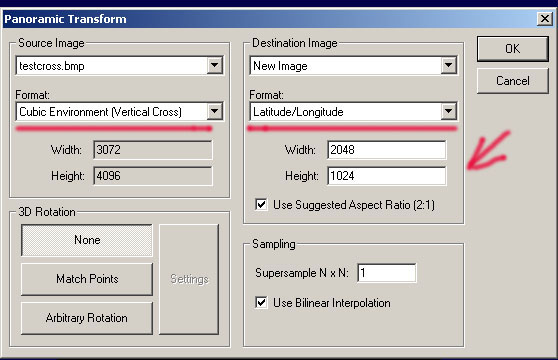
Use Cubic Enviroment (vertical cross) for your source image. Destination image should be a new image, latitude/longitude
and 2048x1024. Click ok.
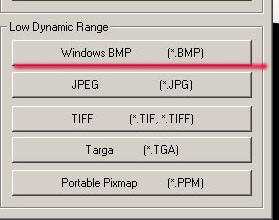
Now wel'll just save our image as a bmp, I saved mine as testcross2.bmp.

Click yes.
Step 5: Final touches in Photoshop.

Now we open testcross2.bmp in photoshop for the final touches. We begin with croping it so that only sky is visible and cut off all the black,
try to crop as low as possible otherwise the clouds may come down to low in bf2. Important! after crop we'll resize the image to the standard 2048x512 sky format in bf2, select
image-image size and change the height to 512, uncheck "constrain proportions". Your size should now be 2048x512.
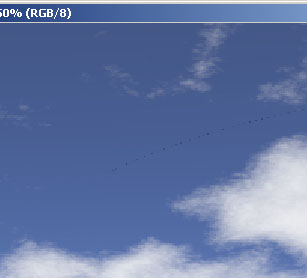
The conversions process in HDRshop will give us some black dots to the right and left of the picture,use the stamp tool with a small brush to remove these. Alt click with the stamp tool just above the black pixel and then you can paint it over with similar blue or white colored pixel(s). The small brush size is so that we wont ruin our fine sky and make the stamp changes as subtle as possible.
![]()
To get rid of the misaligment in the joint where the sky texture start and end, we create a gradient inside a rectangular selection that should be where the atmosphere starts. I used the color picker tool to get similar colors with just slight adjustments of the colors in the gradient.
![]()
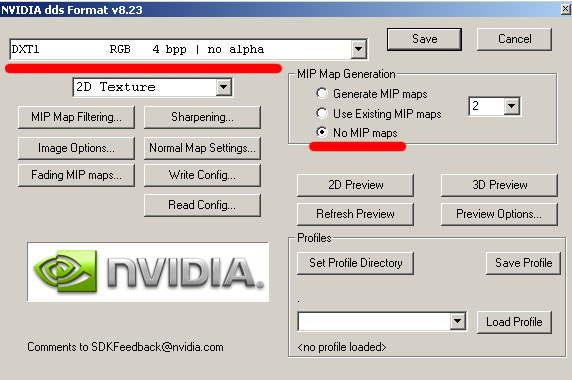
Now we are ready to save, put your file in battlefield 2/mods/yourmod/objects/textures/sky/ (if this directory doesnt exist we create it) save as a dxt1, always keep a non compressed version of your sky in PSD or BMP format since DXT1 is heavily compressed and resaving this format will make your sky look bad with more compression artifacts. Always save the DXT1 from a uncompressed source.
You should now be able to select your texture in the editors texture browser.
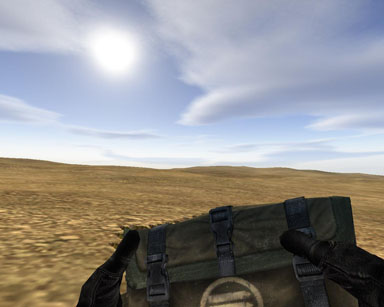
And voila, no more boring standard bf2 skies.
Use your imagination mix your sky with real clouds and the transform tool, blend them with overlay, mix with more cloud layers and you can get some amazing results. Experiment in terragen to get more varied atmosphere and skies, make a nightsky, test around with the cloudsettings.
Hope you learned something valuable.
Fenring